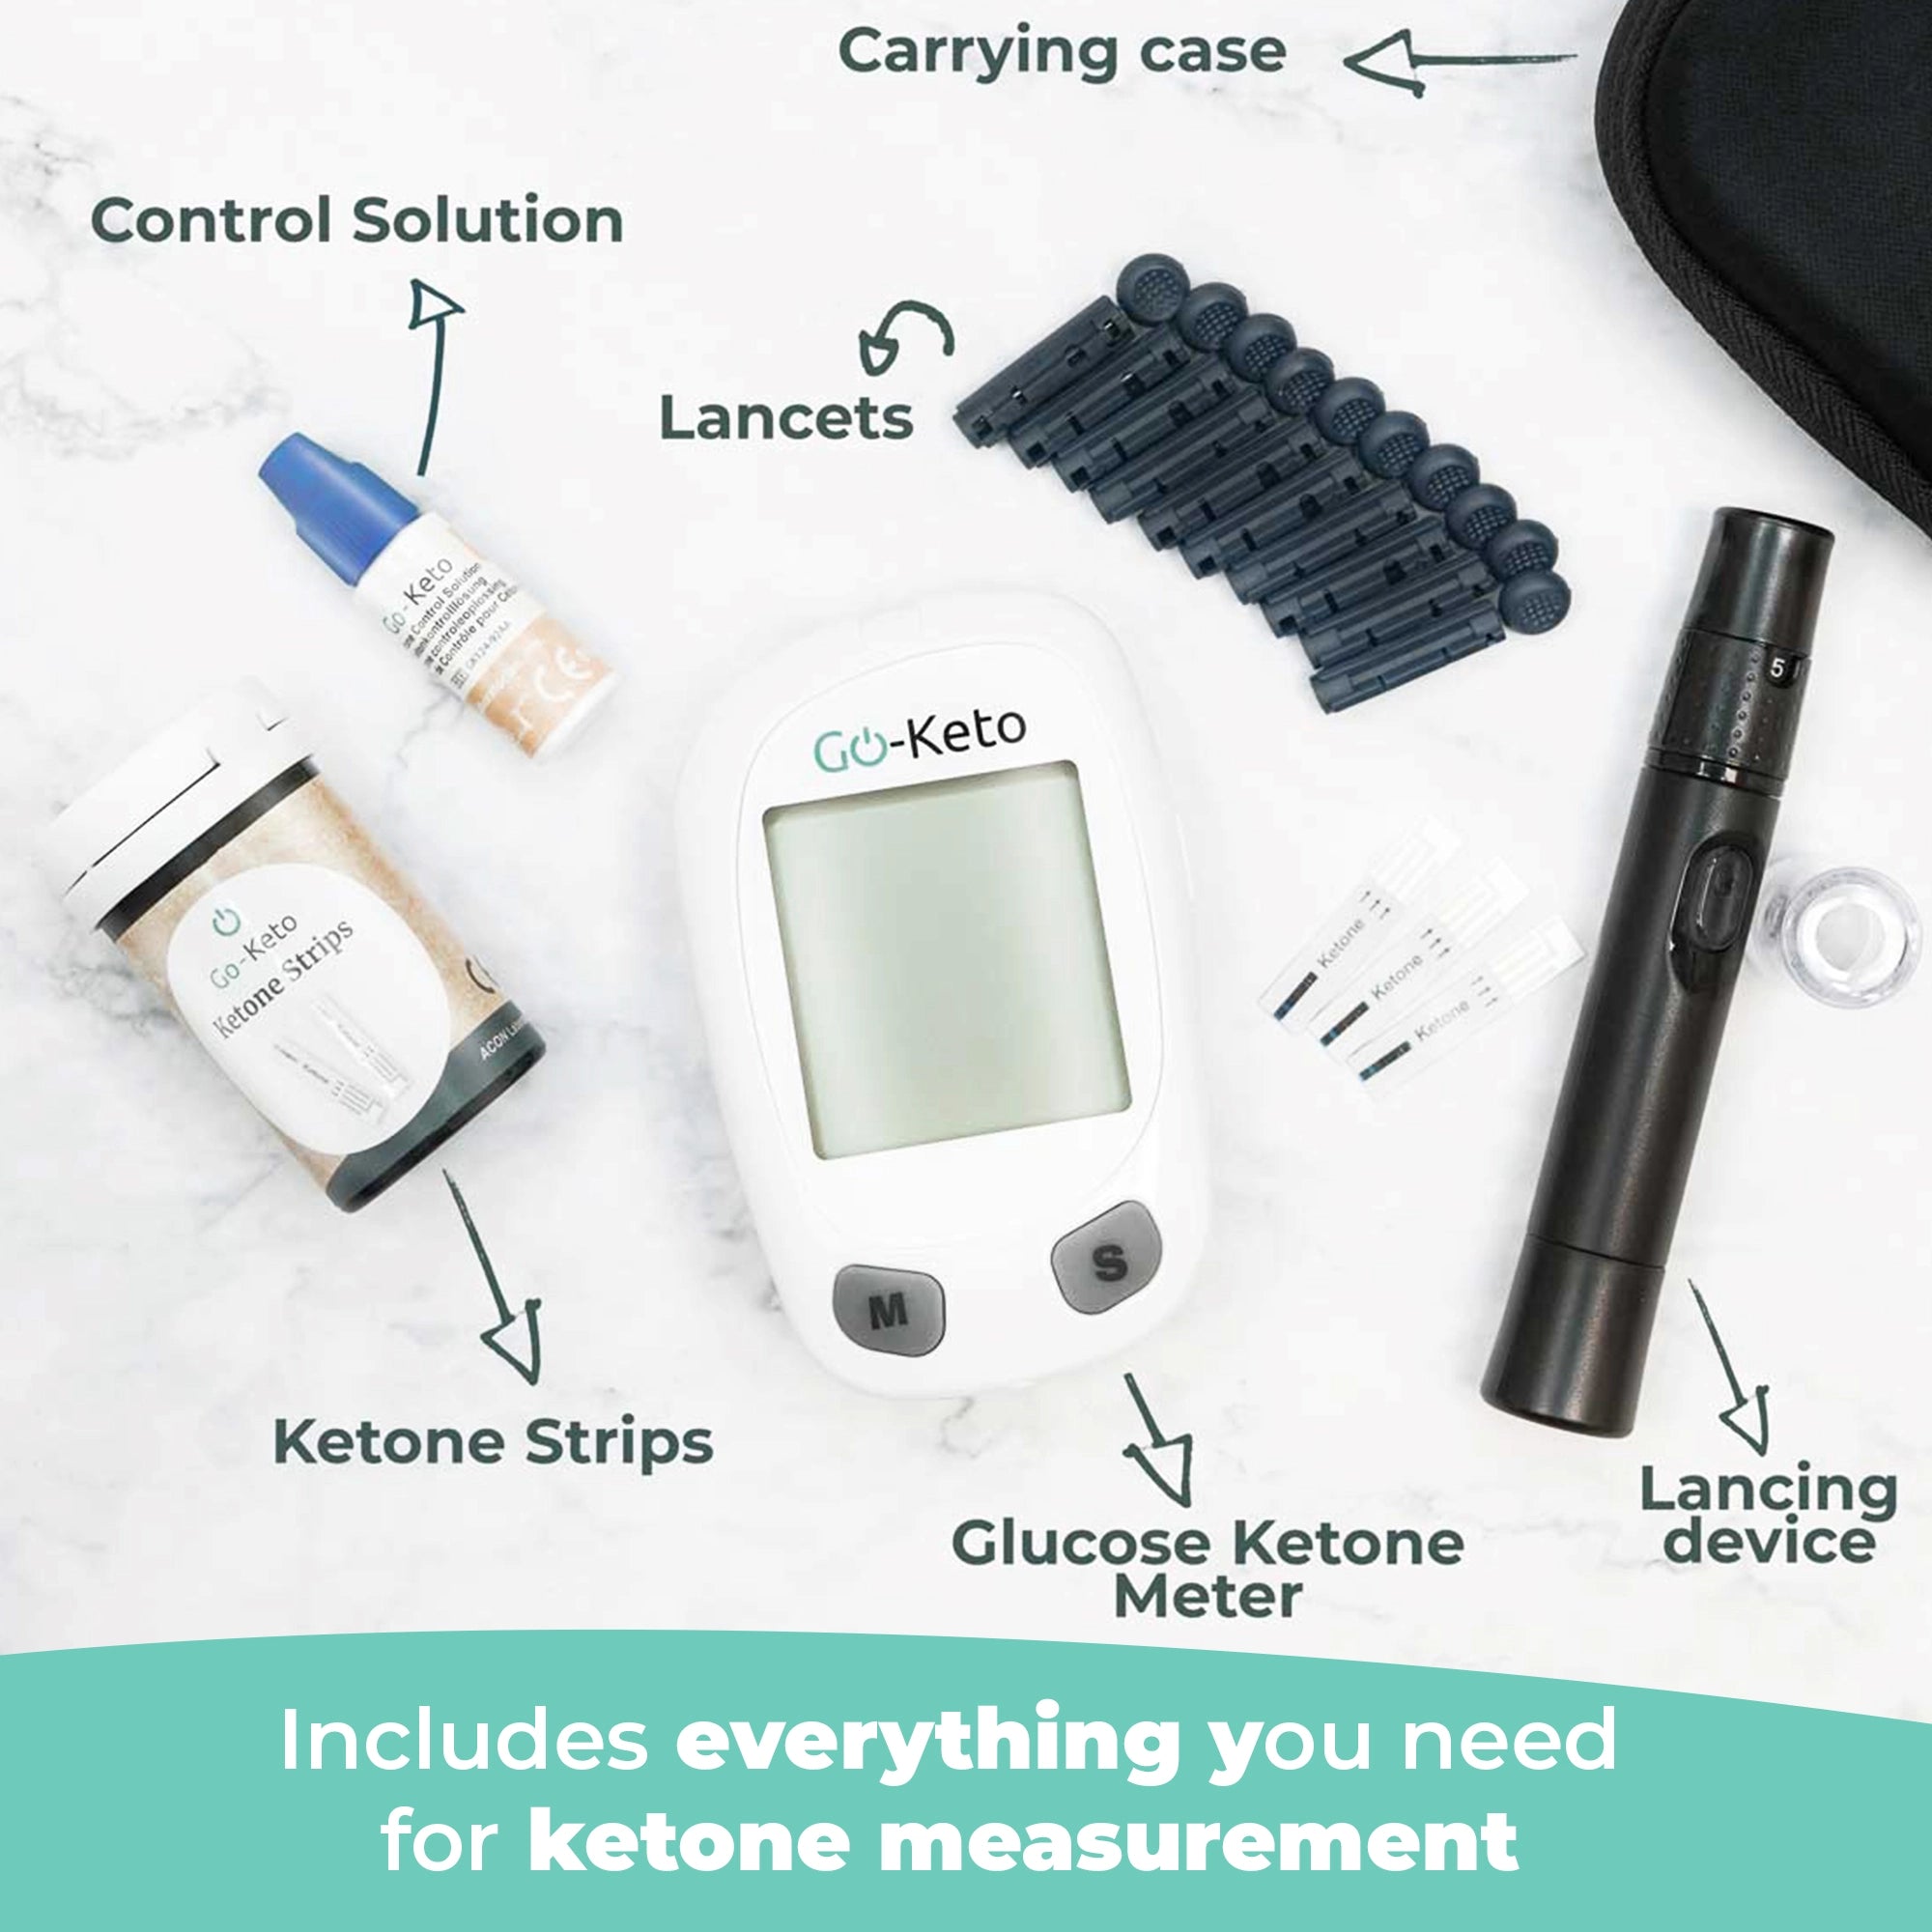
Step 1: Insert the Batteries
Open the battery compartment on the back of the meter. Remove the batteries from the plastic packaging. Insert two batteries, ensuring the plus (+) and minus (–) symbols match. Close the compartment: insert the bottom edge first, then click the top into place.
Step 2: Remove the Protective Film
Peel off the protective film from the display. The screen is now ready for setup.
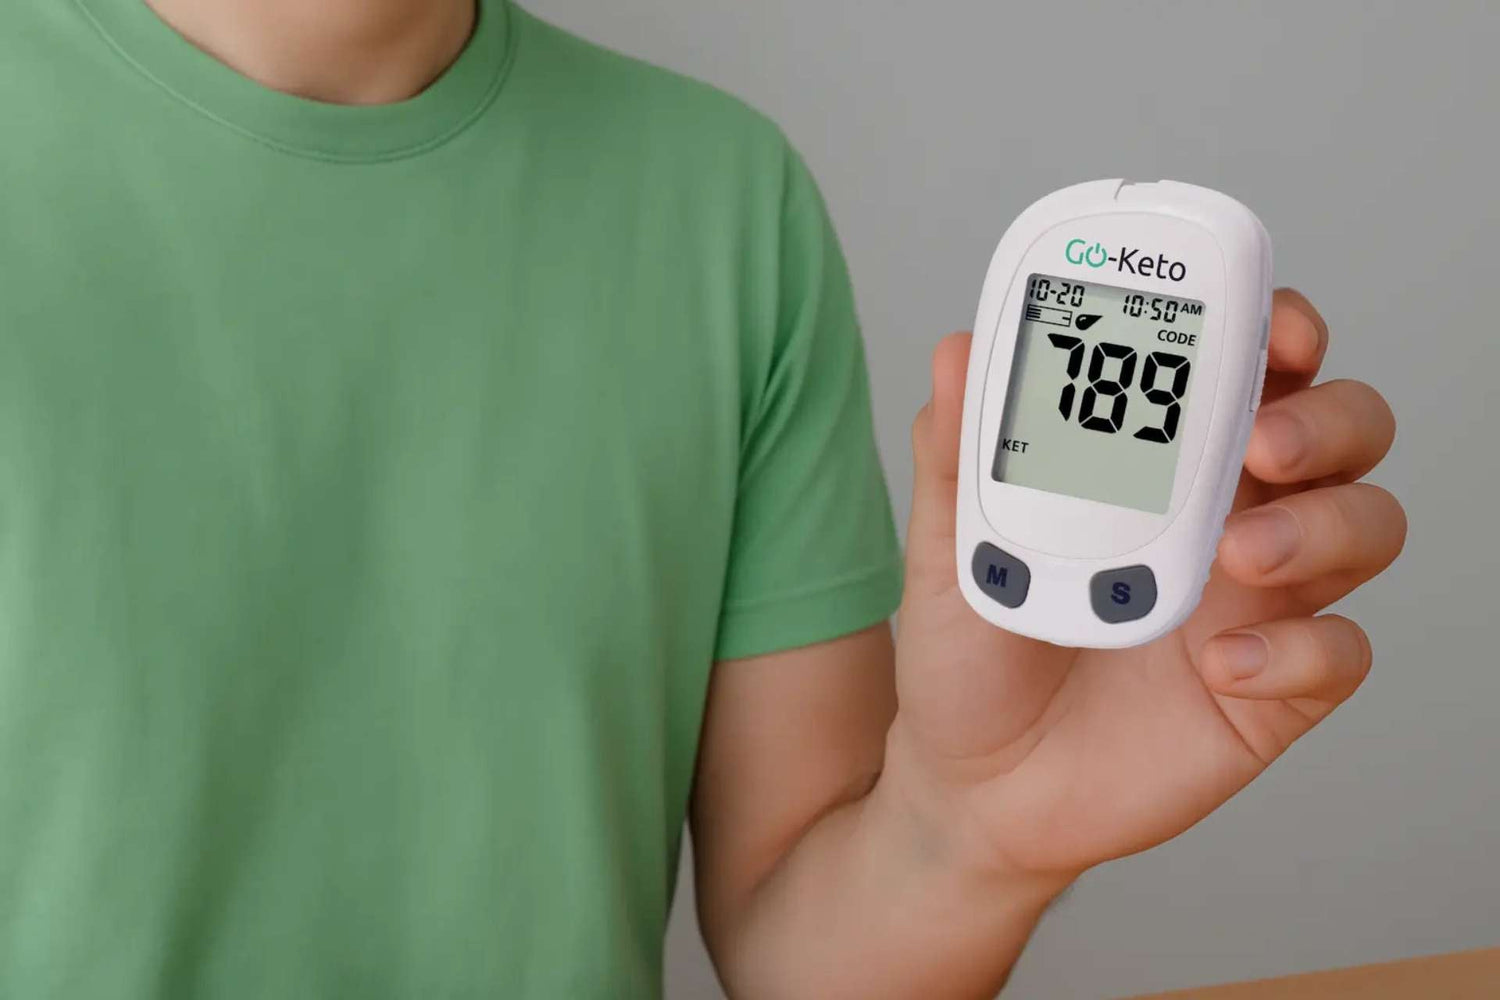
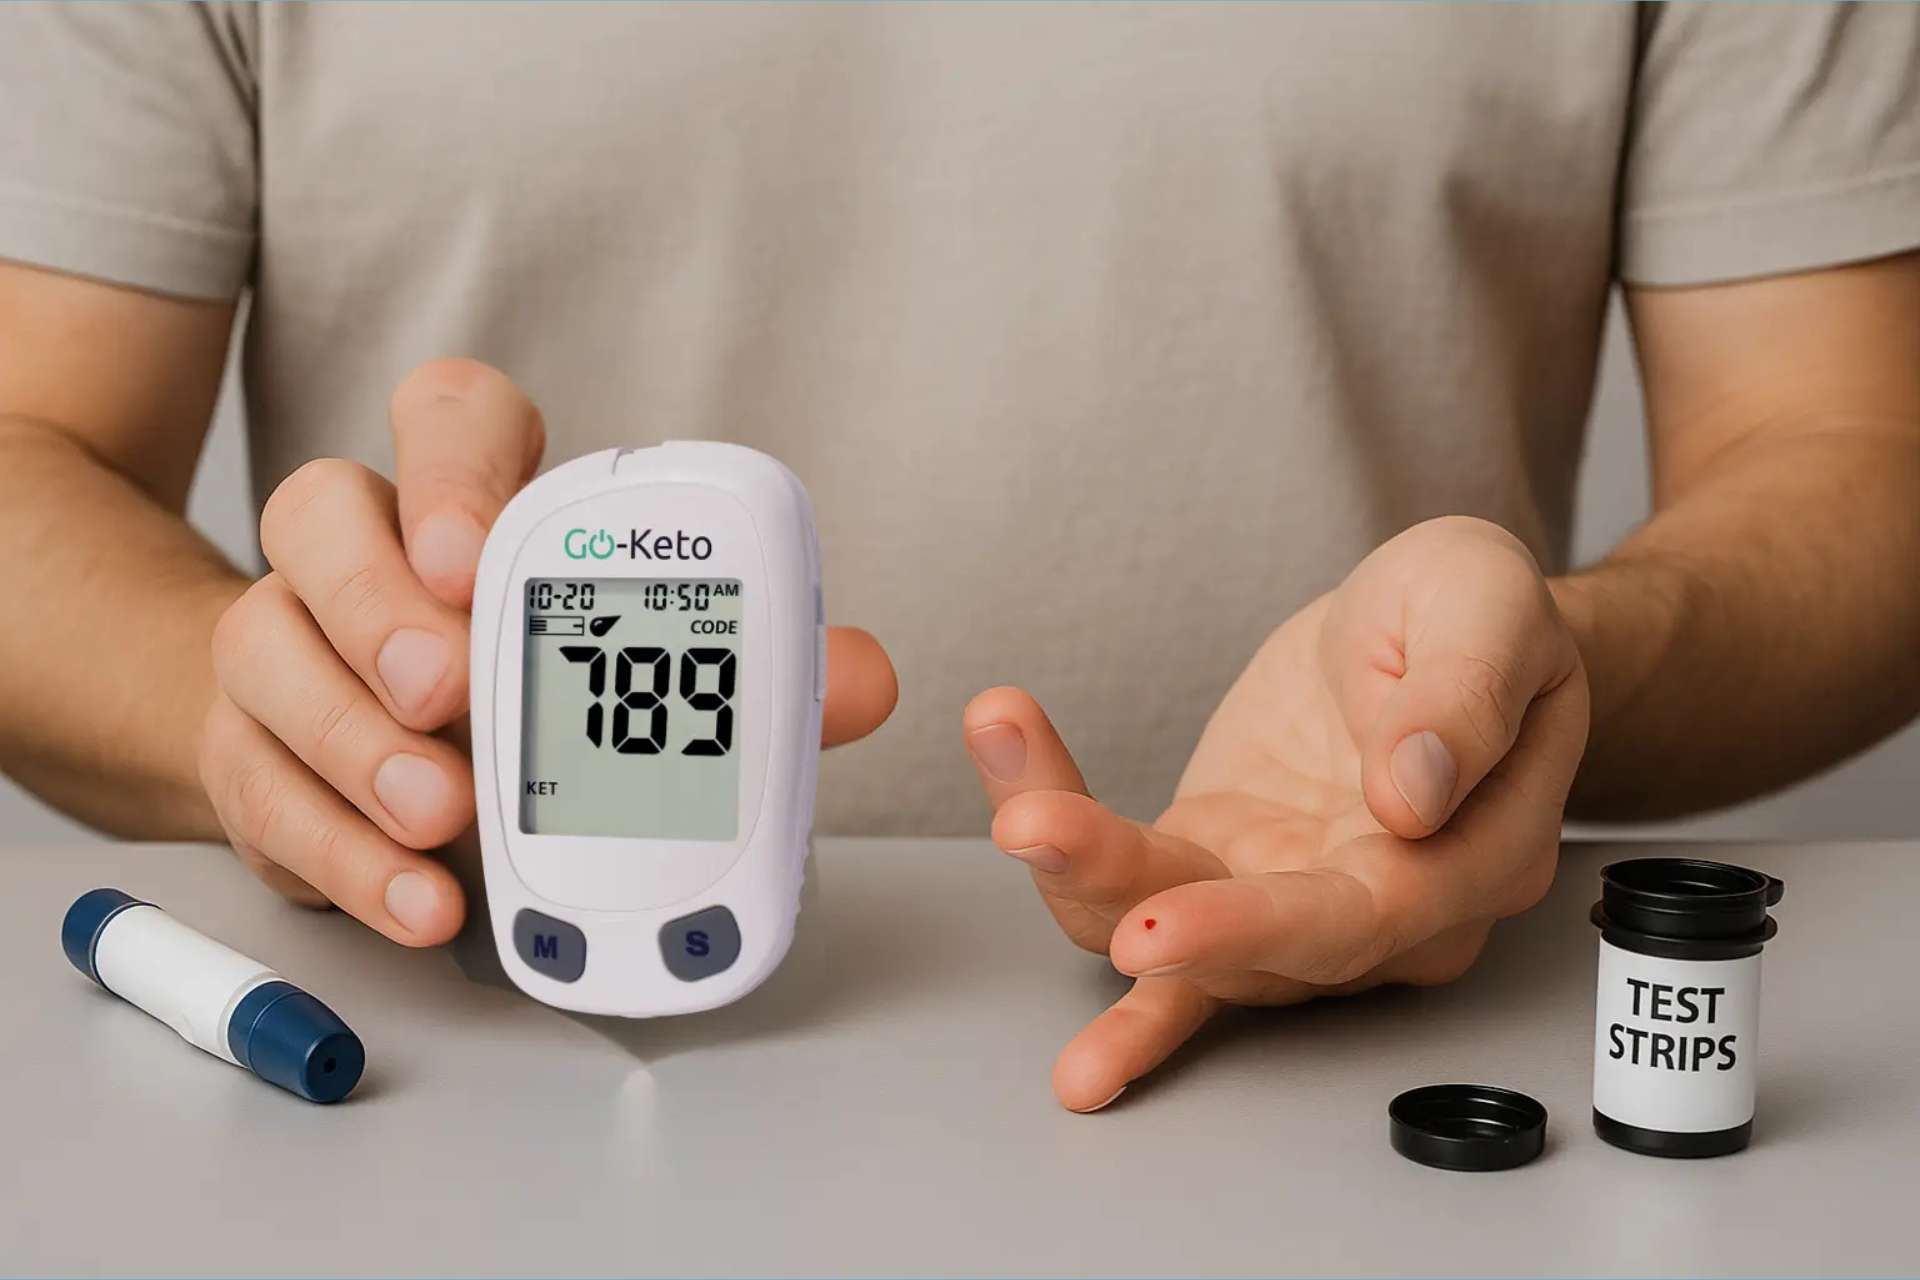
Step 3: Set Date and Time
Press and hold the S button for just over 2 seconds to enter setup mode.
Choose 24-hour or 12-hour clock format using the M button. Confirm with S.
Then set the year, month, day, hour, and minutes.
Use M to adjust each value and S to confirm.
Step 4: Toggle Alarm and Sound Settings
Meal Marker: Keep Off (recommended for keto use).
Sound: Set to On to hear beeps for confirmations.
Alarms (for medication, reminders, etc.): Keep all set to Off, unless needed.
Confirm each option with the S button as you go through the setup.
Your Go-Keto meter is now ready to use!